Stretching Good Ingredients for Plant Based Recipes

Hi all,

        I apologize for having not posted since February.  In February, I was offered to take over a teaching position in the middle of the semester and work took over.  I have enjoyed teaching at this wonderful school over the summer and I am finally off for a couple of weeks before I get back into gear to teach again.  But, it is my priority to update and post to this blog regularly so that you can be inspired to live a rich, healthy and sustainable life simply and frugally.  

        Today, I would like to share a couple of pictures of my latest creation: Hazelnut Milk.

hazelnutmilk1

 Here is why I was inspired: 

       I was at a vegetarian festival last week and I overheard a speaker in a tent say that almond milk from the store didn’t taste good and that she has been making almond milk for a long time.  The phrases that stuck with me “soak almonds” “add water” “add a date”.  So, after the festival, I was on a mission to make my own nut milk and keep the pulp for another purpose.  Here is the pulp: 

         hazelnutpulp

 I want to use the pulp to make something savory like a nut pate or a cheese spread that I can just spread onto some toast for a light meal.  If I like what I make, I can remember to make it for gatherings and other events!  

True, I paid around four dollars for the hazelnuts from the bulk bin and I put in the elbow grease and time with the cheesecloth and blender AND I have dishes to do. But, not only did I make some creamy and delicious nut milk, I was also able to use it as creamer for my coffee and I have this beautiful pulp leftover to make one or two savory creations.  

Here is a picture of my hazel nut dandelion “coffee” (no caffeine).  Move over Dunkin’ Donuts! 

hazelnutmilkcoffee


I apologize for the lack of recipe and DIY photos, as I don’t have anybody to take pictures of me making the milk.  I learned how to make this fabulous nut milk after watching a show on organic living on an educational channel here near Chicago. I will try to explain this as clearly as I can. Also, I DON’T measure – you have been forewarned 😉 

1) Soak raw nuts in filtered water for at least 6 hours.  Overnight is best. If you want to add some sweetness, soak a date the night before too. 

2) After the nuts have been soaked, strain them in a colander and put them in a blender. 

3) Add around two cups of filtered water (and the date, if using), or more if you don’t want your milk to be very creamy. 

4) Blend until the nuts have been pulverized. 

5) Take a cheesecloth and pour the nutty goodness into it. Make sure you have a container with a wide enough mouth for you to squeeze out the milk.  

6) Squeeze out the milk and make sure you hold the cheesecloth like you would a bag of coins with your other hand, or have a partner do it for you while you squeeze. 

7) Repeat the process of filling up the cheesecloth and squeezing as much as possible.  

8) Set aside the pulp for another use.  

If the milk is still too “creamy” like half and half, you may add more water to it.  But I find that it is better to err on the side of adding too little water as opposed to diluting the flavor by adding too much water.  

Have a wonderful day and I hope to return soon with a pate recipe!  

Feeling a little under the weather today

Hi all!  Today was a normal day, even though my throat has been a little scratchy since last night.  I noticed a lot of sinus drainage later this morning and I was unusually tired.  After experiencing some chills, I took some of Melaleuca’s Activate-C, which is a Vitamin C drink mix containing zinc that helps you with boosting your immune system.  It’s not a miracle cure, but I feel better knowing that I have it at my finger tips when I don’t feel so hot.  I also ordered Counteract AM and Counteract PM cold medicines last month, even though I rarely get sick.  I doubt I will use it today, but it is very nice to have it at home!

Because my health comes first, I am going to lay low and take it easy for the weekend, so I hope that you have a wonderful Valentine’s Day weekend!  One tip I have for our frugal Valentine’s Day lovers is to wait until the day after to stock up on cards, party supplies and candy so that you will save money and be prepared for next year’s Valentine’s Day!  I plan to take advantage of the post Valentine’s sales on Saturday afternoon.  If I find anything good, I will post it.

For now, I am signing off!

Calling all Windy City Readers! Your invitation to TAP-Chicago’s Lunar Ball 2014

Hello all,

I have been a volunteer for the planning committee for TAP (Taiwanese American Professionals) Chicago’s annual Lunar Ball formal gala.  For only $65 until Valentine’s Day, Friday, 2/14/14 (price goes up after Early Bird 2/14 deadline!), you will enjoy food from various restaurants, an open bar and very interesting young professionals!  A portion of the proceeds will go to a local nonprofit.  It will also be a great opportunity to meet me in person!  For more information, click on the link here:  http://tapchicago.org/lunar-ball-2014/

TAP-LNY2014-flyer-v5

Coffin Bread Preparation!

I wanted to make Coffin Bread with grits and white sausage gravy, but unfortunately, it took me a little more time for me to attend to an assignment I’m working on than estimated. So my advice to bloggers who blog on time constraints is to keep the momentum up. I tend to just be absent for a long time because I feel as if I have to type completely detailed and thoughtful posts. But I am learning how to be consistent with posting by posting regularly, even when I don’t have time to post something elaborate.

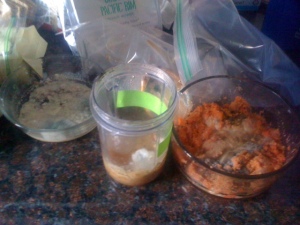
I went to Panera Bread to get a loaf of bread (unsliced) and I got some grits and ingredients for the gravy!

Here is a picture of the bread (yum) and grits!  This creation will be dedicated to my pastor, Bob, because he loves grits and he’s from the South!

coffin_bread_ingredients

Saga of the Stinky Fridge: Part II

Hi all!  I am a little short on time, so I am going to make this post short and sweet.

This morning, I decided to start deep cleaning my refrigerator after moving all of the nasties out last week.  Let’s face it, sometimes we have these chores that we need to attend to, but time keeps us from getting them done.  But I wanted to get my post up on time – no matter what, so I cleaned two door shelves and boy, did they need cleaning!

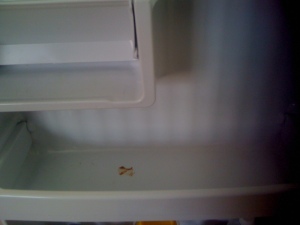
Here is a “before” picture of the shelves I cleaned.  I don’t know what the brown stain was from or how long it had been there.  But, it was a sticky, sap like substance that looked incredibly nasty.

stinky_fridge_parttwo_before


I used Melaleuca Tough and Tender all purpose cleaner diluted with water to wipe the shelves.  Then, I used Melaleuca Sol-u-mel (which has over 100 uses!) diluted with water to get rid of the stain.  Sol-u-mel Lemon Blossom has a strong lemon scent, so please make sure that you spray only on the spot and not accidentally onto your food.  It’s non-toxic, but who wants their peanut butter to taste like lemon blossom cleaner?

I love using all of the Melaleuca cleaning products because they are sold in concentrated formulas and all you need to do is fill only about 1/10 of the spray bottle with the product and then the rest of the bottle with tap water!  So not only are they eco-friendly and safe to use – they also help me save money!  When I cleaned my fridge, I didn’t use the concentrated forms because they were already effective enough!

stinkyfridge_parttwo_after


I look forward to Part III next week where I will have made a significant amount of progress!  Have a wonderful week and stay green and clean!

Melaleuca Cleaning Products Are Gentle on Your Hands!

Am I the only one who doesn’t want to see my own Facebook movie? I just don’t care about it.

Anyways – I had a ton of dishes to wash last night and a lot of cleaning to do. I used Tough and Tender to clean and it was easy on my sinuses and bare hands because it doesn’t have the crazy chemicals and toxins that 409 or Lysol has! Here are my hands AFTER cleaning many times with Melaleuca products!

post_cleaning_toughandtender_hands_stillsmooth_2514

I have a major deadline and a couple of intense days, so I am off for the week.  I will be back on Monday with another installment of The Saga of The Stinky Fridge: The Sequel!


The Coffin Bread Series: Part One

Last week, my friend posted a picture of a gorgeous breakfast creation of hers that looked a lot like a southern Taiwanese specialty called “Coffin Bread’.  Coffin bread is simply a thick slice of toasted or fried bread that has a little “lid” cut out on top and is hollowed out so you can fill it with whatever you want.  In Taiwan, they fill it with egg, mayonnaise, porridge and shrimp. I have never eaten coffin bread before, even though I have been to Taiwan twice.  I have wanted to make coffin bread for a long time, but telling my friend that her picture inspired me to make some pushed me to take action.

So, every week, I am going to make a different kind of coffin bread to suit my palate.  There was a sale on Russet potatoes, so I decided to make German potato salad and stuff it in a thick slice of Italian bread because the store didn’t carry any unsliced loaves.

Here is the picture of the finished product:

coffin_bread_cover_part1_2414


I made the potato salad with boiled potatoes, onions, bacon, mustard, basil salad dressing, apple cider vinegar, and sour cream.  It was a rather warm salad that is best warm or at room temperature.  I fried the bread in bacon grease,butter and canola oil because I was too cheap to dump out the bacon grease and I needed the bread to fry quickly.  It was a little bit hard to cut out the “cover” because Italian bread has holes in it.

Here is a picture of the open faced Coffin Bread:

coffinbread_potatosalad_part1_openface_2414


It was okay.  I was quite full after I had half of the coffin bread and was tired of potatoes.  I think that it is imperative that you eat your coffin bread when it is hot and not wait too long before eating it because it tastes better hot. Next week, I plan to make coffin bread with grits, sausages and sawmill gravy.  I really hope that I will make the time to bake some white bread. I have a feeling that it will taste better with regular white pan bread and grits.

Saga of The Stinky Fridge Part 1

I will have to be very honest with you and tell you that I am not sure about the number of installments there will be in The Saga of The Stinky Fridge.  (This IS a bachelorette pad) I hope that if you fridge neglect tendencies like me, you will be inspired and encouraged by my stories.  Here is a sampling of what’s been lurking around:

mcnasty_saga_stinkyfridge_part1_2314

Action Plan to attack the Invaders of Stink:

1) Wipe out the nastiness and breathe with my mouth as much as I can while listening to some happy music.  I will listen to The Black Keys  (Brothers CD if you care) on Spotify.

2) Soak it with fully concentrated amounts of Sol-U-Guard and Baking Soda for around 10-15 minutes. The stuff is incredibly concentrated and usually used to dilute with water.

Here is what it looks like while it is soaking:

soluguard_bakingsoda_soak_stinkyfridge_2314

3) Examine and throw away anything that looks suspicious while waiting. (Note: There was a LOT of nasty stuff I found in the fridge and I will spare you from the grotesque photos)

4) Rinse the dishes out and load the dishwasher and pop in a pod of Melaleuca Diamond Brite Automatic Dishwasher Detergent.

De-stink-ification Part I

Here is a picture of the fridge AFTER getting rid of the smelly and spoiled contents:

destinkification_2314_stinkyfridge

Here is a picture of some of the clean, safely disinfected dishes!

stinkyfridge_part1_2314_cleandishes


In Stinky Fridge Saga Part II, The Sequel – I will be cleaning my fridge from the inside out next week!  Have a great week and see you tomorrow!